Use some really decorative paper with a simple die cut to make an effective greeting card
I needed to make a birthday card this week and the recipient loves poppies so hence this card. I love the really decorative poppy paper and all of the papers in this pack are double sided with a plainer back to them. I found a matching blue stripe pattern to back the poppy die which makes it pop out. Paper packs are a great way to have corresponding papers for a project.
I really debated with this card to put the die cut poppy on double sided foam pads or the poppy paper that surrounds it. After playing around with them for a while I decided if I raised the paper rather than the poppy, the lovely patterned paper stood out better than gluing it flat onto the blue striped paper. It also then worked well as I shaped the centre of the poppy to give it a bit of a 3d feature.
If you don't have the same dies or paper it really doesn't matter - I'd like to inspire you to make a similar card just with what papers you have and a simple die in a shape within the front of the card. Just adjust the circle you cut out to fit your die cut.
Follow the below link to find out how the card was made
You will need
- Poppy Moments die from Stampin Up!
- Peaceful Poppies Designer paper by Stampin Up
- 7 . 5 cm diameter circle die
- Black, red and dark red card
- Shaping tool and foam mat
- Birthday Banners stamp and die set by Stampin Up!
- Guillotine with scoring and cutting blades
- Black ink pad
- Glue and double sided foam pads
- Die cutting machine
- Stamping aid such as a mysti or a stamparatus
- Cut a piece of black card to 14 . 5 cm by 29 cm and score at 14 . 5 cm to fold it and turn it into a square base card
- Cut a piece of the blue striped paper to 13 . 5 cm square and glue it centrally to the front of the black base card
- Cut a piece of the red and blue poppy paper to 12 cm square
- Use the circular die to cut a hole in the centre of the red and blue poppy paper
- Using double sided foam pads attach the red and blue poppy paper centrally over the blue striped paper on the front of the base card
- Die cut the large poppy shape out of the red card, the poppy outline out of the dark red card and the centre of the poppy out of black card
- Glue the poppy outline to the large poppy shape, then glue the poppy in the centre of the circle on the base card
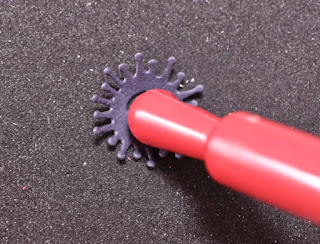
- Using the shaping tool and the foam mat, gently rub the poppy centre, in the centre, to shape it into a bowl shape
- Glue the poppy centre piece into the centre of the poppy
- Stamp a banner onto a scrap of the blue striped paper using a black ink pad
- Using your stamping aid, line up the Happy Birthday greeting within the banner shape and then stamp it using black ink. (I put a piece of acetate over the banner stamped shape and then curve the greeting stamp so it fits the curved shape of the banner - the acetate holds the stamp in place whilst you curve the stamp before picking it up with the tab of the stamping aid. Don't forget to remove the acetate before stamping)
- Die cut the greeting banner out and then attach to your card using double sided foam pads
Have fun crafting X


