Use Stampin Up's Beautiful Trees Die set to make this pretty thank you note
I Made a male based birthday card last week using the Beautiful Trees Die set by Stampin Up and said how versaitle it could be - so this week I've made a pretty thank you note from the same die set.
Unlike the last card I made where I used the trees DSP to create the foliage colour, this week I made my own using several shades of green ink pads and a finger dauber. You could get a richer colour using distress inks but I didn't have enough shades of green for my liking.
Follow the below link to find out how the card was made
You will need
- Beautiful Trees Die set by Stampin Up
- Beauty of Friendship stamp set by Stampin Up (I used the greeting from this set, so you could use a greeting from a different stamp set)
- White, pink and brown card
- A6 white card base
- 3 shades of green ink pads (I used Stampin Up's wild wasabi, garden green and mossy meadow)
- Pink ink pad (I used Versacraft's ash rose)
- Finger dauber or small sponge
- Rounding corner punch
- small flower punch (mine came from woodware and the flower is about 1 . 5 cm wide)
- Large embossing tool and foam pad
- 8 pink gems (mine were about 0 . 5 cm diameter)
- Double sided foam pads and double sided tape or glue
- Die cutting machine
- Cut a piece of white card to 11 cm by 15 cm
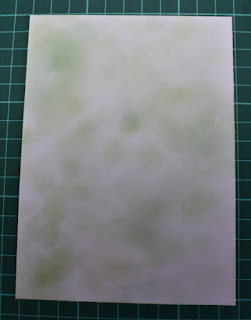
- Use a finger dauber or small piece of sponge to pick up ink off the the lightest shade of green ink pad and swirl across the white piece of card. Create some light areas and some darker. Cover most of the card
- Wipe as much ink off the dauber as possible and then use the middle shade of green ink pad to pick ink off the pad and shade some more patches on the white card. Don't cover as much of the card this time
- Then do the same with the darkest shade of green. You should now have a greenish piece of card with a mottled pattern on it
- Cut the large foliage out of the centre of this mottled card using the die from the die set
- Trim 0 . 5 cm from each edge of this green mottled card and round the corners with the rounded corner punch.
- Cut a piece of pink card 13 cm by 9 cm and round the corners using the punch. Cut a piece of white card 12 cm by 8 cm and again round the corners with the corner punch
- Use the pink ink pad to stamp your greeting on the bottom right of the white piece of card
- Stick the green card, then the pink card then the white card to the centre of your base card
- Using the large tree die from the die set, cut one from brown card
- Punch 5 flowers from pink card using the flower punch
- Using double sided foam pads stick the tree to the base card then the foliage ontop. I cut down the double sided foam pads so they stick better on smaller branches and can't be seen from the front.
- Shape the flowers using the embossing tool and foam pad
- Glue the flowers over the tree
- Stick a gem inside each flower and 3 gems along the bottom left of the white piece of card on the opposite side to the greeting
I nearly used hearts instead of flowers on the tree and thought that might make a fabulous anniversary or get well soon card.


