Use Stampin Up's Basket Bunch stamp and die set to create this chirpy Easter card
I have used stamps from the Basket Bunch Stampin Up stamp set to change plain papers into decorative papers. It's quite easy to do and means you can colour coordinate your papers and you do not have to have a stash of decorative papers to make your own cards.
This technique of stamping your own background papers can be done with any stamps, inks and plain papers/card. So do not limit yourself to this Easter card - you can make backgrounds of flowers, leaves, stars, characters - the list is only limited to the stamps in your stash!
I've used a stamping aid to stamp the lines of eggs that border the central white card. However it can be done without one of these, if you do not have one, just use your normal clear acrylic block and steady your hand!
Follow the below link to find out how the card was made
You will need
- Basket Bunch stamp set by Stampin Up
- Basket Builder framelits by Stampin Up (I only use the chick dies from this set so you can cut with scissors if you do not have the set)
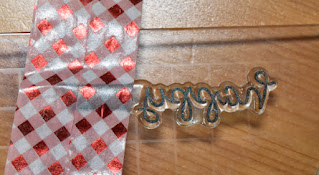
- Happy Easter greeting stamp (I used one from Eggstra Special Easter stamp set by Lawn Fawn)
- 5 inch square white base card
- Yellow and white card
- Rounding corner punch
- Colouring medium of your choice (I used Promarkers - tulip yellow, rose pink, tea green and honeycomb)
- Black, yellow and blue ink pads (I used a black ink pad from Lawn Fawn, So Saffron and Island Indigo from Stampin Up)
- Washi tape (used for masking so any patterned tape will do)
- Glue and double sided foam pads
- Stamping aid (mine is Stamparatus by Stampin Up)
- Die cutting machine (I use the Sizzix Bigshot)
- Cut a piece of white card to 8 cm square
- Put the white square in your stamping aid and put the line of eggs stamp towards an edge of the square. Pick up the stamp with the tab of the stamping aid, ink it with black ink and stamp onto the square. Do not remove the stamp at this stage.
- Turn your white square card 90 degrees, re-ink the stamp and stamp again. Do not remove the stamp but repeat this process twice more. You will now have a white square with an egg border
- Colour in the egg border
- My Happy Easter greeting is in one stamp and I wanted to stamp the Happy and Easter words seperately. If yours are seperate just stamp them now using blue ink pad.
If yours is like mine, then line your white sqaure back into your stamping aid.- Lay a piece of acetate over it and then line up the Happy part of the stamp towards the top of the square just below a line of eggs.
- Use the tab of the stamping aid to pick up the stamp and remove the acetate.
- Put washi tape over the Easter word and ink up the Happy word.
- Remove the washi tape and stamp Happy onto the white square.
- Remove the stamp from the tab, clean it thoroughly and dry it
- Put the acetate back over your white square to protect it
- Line up the greeting so this time the Easter word is lined up and the bottom of the square
- Pick up the stamp on the tab and remove the acetate
- Cover the Happy word in washi tape and ink up the Easter word
- Remove the washi tape and recover with fresh washi tape
- Stamp the Easter word onto your white square
- Lay a piece of acetate over it and then line up the Happy part of the stamp towards the top of the square just below a line of eggs.
- Using black ink, stamp two chick feet just above the word Easter on the white square
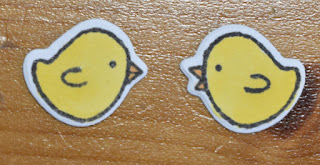
- Stamp two chicks using black ink onto a seperate piece of white card. Colour them in and die cut them out
- Using the yellow ink pad, stamp lots of daffodil heads around the outside of the base card. They can overlap each other and go off the edge of the card. They do not need to go too far into the centre as we will be covering this with another piece of card
- Cut a piece of yellow card to 4 inch square
- Using the rounding corner punch round the corners of the yellow square and the one with the egg border
- Glue the yellow square centrally onto the base card then glue the egg border white square centrally ontop
- Use double sided foam pads to stick the chicks to the front just over their feet
- You can use the rounding corner punch to round the corners of the base card too if you wish


