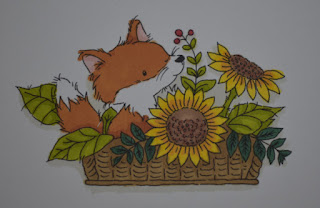
Use digital papers and a digital stamp to create these beautiful fox and flowers cards
Last week I used a pre-coloured digital stamp, but this week I show you how you can use a black and white outline digital stamp to make a beautiful card. I have also bought and downloaded the papers to use for backing papers.
Digital stamps and backing papers are a great option if, like me, you do not have access to a local craft shop. It also allows you to easily store the images and only print what you need. Alot of the time you can re-size the images too, so they can fit your particular project. They do not need to be printed onto fancy papers either. I've used a canon printer and a lightweight card and just selected the standard print quality of the printer.
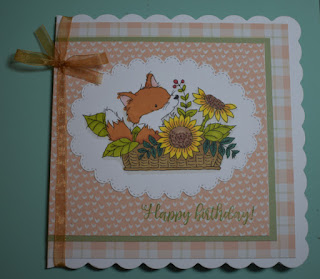
This week I've made two slightly different cards but using the same image.
Follow the below link to find out how the card was made
You will need:
For rectangle card:
- 'Hello Punpkin - fox and flowers' digital stamp by Lili of the Valley (It can be bought here)
- Happy Easter digital papers by Helen (Can be bought here)
- A4 sage and white card
- Colouring medium of your choice (I used promarker pens - spice, pale pink, caramel, tulip yellow, honeycomb, pear green, holly, cinnamon, walnut, cool grey1 and ruby)
- Happy Birthday stamp (I used one from 'All the Party Hats' stamp set by Lawn Fawn)
- Green ink pad (I used garden green by Stampin Up!)
- Rectangle die 10 . 5 x 7 cm (optional as this can be cut with a guillotine or scissors)
- Die cutting machine if using a die
- Glue or double sided tape
- Download the Hello Pumpkin - fox and flowers digital stamp and print onto white card so the image is about 9 cm wide by 6 cm tall
- Colour in the image and then die cut into a rectangle shape
- Download the Happy Easter papers and print the sage green with pattern onto white card so it measures about 12 . 5 cm wide by 10 . 5 cm high. Then print the orange tartan pattern onto white card so it measures about 12 . 5 cm wide by 9 cm high. Cut both of these rectangles out.
- Cut an A4 piece of sage coloured card in half and fold in half to create an A6 tent shaped base card
- Glue the sage print card to the left hand side of the base card
- Using the green ink pad, stamp the greeting to the bottom right hand side of the orange tartan print rectangle
- Glue the orange tartan print card to the base card as per the below photo:
- Glue the fox image rectangle to the top left hand side of the base card as shown in the below photo
You will need:
For square card:
- 'Hello Punpkin - fox and flowers' digital stamp by Lili of the Valley (It can be bought here)
- Happy Easter digital papers by Helen (Can be bought here)
- A4 sage and white card
- 15 cm square white base card
- Colouring medium of your choice (I used promarker pens - spice, pale pink, caramel, tulip yellow, honeycomb, pear green, holly, cinnamon, walnut, cool grey1 and ruby)
- Happy Birthday stamp (I used one from 'All the Party Hats' stamp set by Lawn Fawn)
- Green ink pad (I used garden green by Stampin Up!)
- Oval die measuring about 11 . 5 x 8 . 5 cm
- Bronze coloured sheer thin ribbon
- Die cutting machine
- Glue or double sided tape
- Download the Hello Pumpkin - fox and flowers digital stamp and print onto white card so the image is about 9 cm wide by 6 cm tall
- Colour in the image and then die cut into the oval shape shape
- Download the Happy Easter papers and print the orange tartan pattern onto white card so it measures about 14 cm square. Then print the orange pattern onto white card so it measures about 12 . 5 cm square. Cut both of these squares out.
- Glue the orange tartan print card to the base card so it matches with the left hand edge
- Cut a rectangle out of the sage card measuring 13 cm square. Glue it ontop of the orange tartan card so the left edges meet
- Using the green ink pad, stamp the greeting to the bottom right hand side of the orange pattern print square
- Glue the orange pattern print card ontop of the sage card so the left hand edges meet.
- Tie the ribbon around the card on the left hand edge
- Glue the fox and flowers oval to the base card


